

This seems fiddly but there are six really good reasons why you should butterfly a leg of lamb.
Here I list the six main reasons for doing it, and at the bottom I describe how you do it - with pictures - so you may of may not want to look at that bit, although I guess if you are considering doing it you are already over the concept of fiddling about in the insides of a bit of animal
The reasons
1. Waste.
A whole leg of lamb is an impressive thing, and when it comes out of the oven it looks lovely and brown and magnificent and smells amazing.
But carving a leg of lamb once it’s cooked is tricky and you always miss some – not just the shank but all of it. It’s expensive and yummy so don’t waste it. It’s also hard to separate the nice bits from the not-so-nice bits so you can get gristle and other nasties in with the meat.
Where did that little kneecap go?…
Once you butterfly it, it is like carving a steak – you eat the whole thing.
And because you can access all of the meat without fiddling around bones, joints and gristle, it’ll feed 8-12 people depending on the size of the leg and, well, the size of the people.
2. Time.
Removing the shank, the bone and any nasties like the kneecap leaves a slab of what is essentially the thigh of the animal: Fabulous meat run through with some fat and other tissue.
When all of that is removed and you’ve trimmed it nicely it is like a big steak. A whole leg takes around 90 minutes depending on size and how you like it. This is foolproof: heat the oven to 200 fan and put it in for 30 mins. Rest for 15 and you’re golden.
It’ll also fit in an air fryer, although I don’t have one so haven’t tested cooking times.
Either way you are saving time and money on the cost of cooking the whole thing.
3. Whoever heard of roast lamb shank?
Nobody does this because shanks (the bit below the knee) need long slow braising. If you leave it on and roast it it’s just not that nice. It doesn’t really get eaten either because the thigh is easier to carve.
Cut the shank off and save it for a different recipe. I freeze them and when I have three or four I braise them for something like a curry.
4. The bones.
You can make stock from the bones after you’ve cooked and carved a leg of lamb but you won’t need that stock for a while. If you butterfly it you can use the bone at the same time to make a stock for gravy for the lamb you’re about to eat.
Since you are only getting a single thigh bone (the bone stays in the shank), you won’t get much depth out of it, so freeze that too until you have enough to make it worthwhile.
As always you can roast the bones or not. It’s nice not to sometimes as you get a more delicate stock which is great for spring dishes.
5. Rubs and marinades.
You are exposing much more surface area to marinades and rubs instead of just the outside so you get much more flavour into it.6. You can cut a piece off.
Roast lamb is lovely but there’s enough meat to leave some spare.
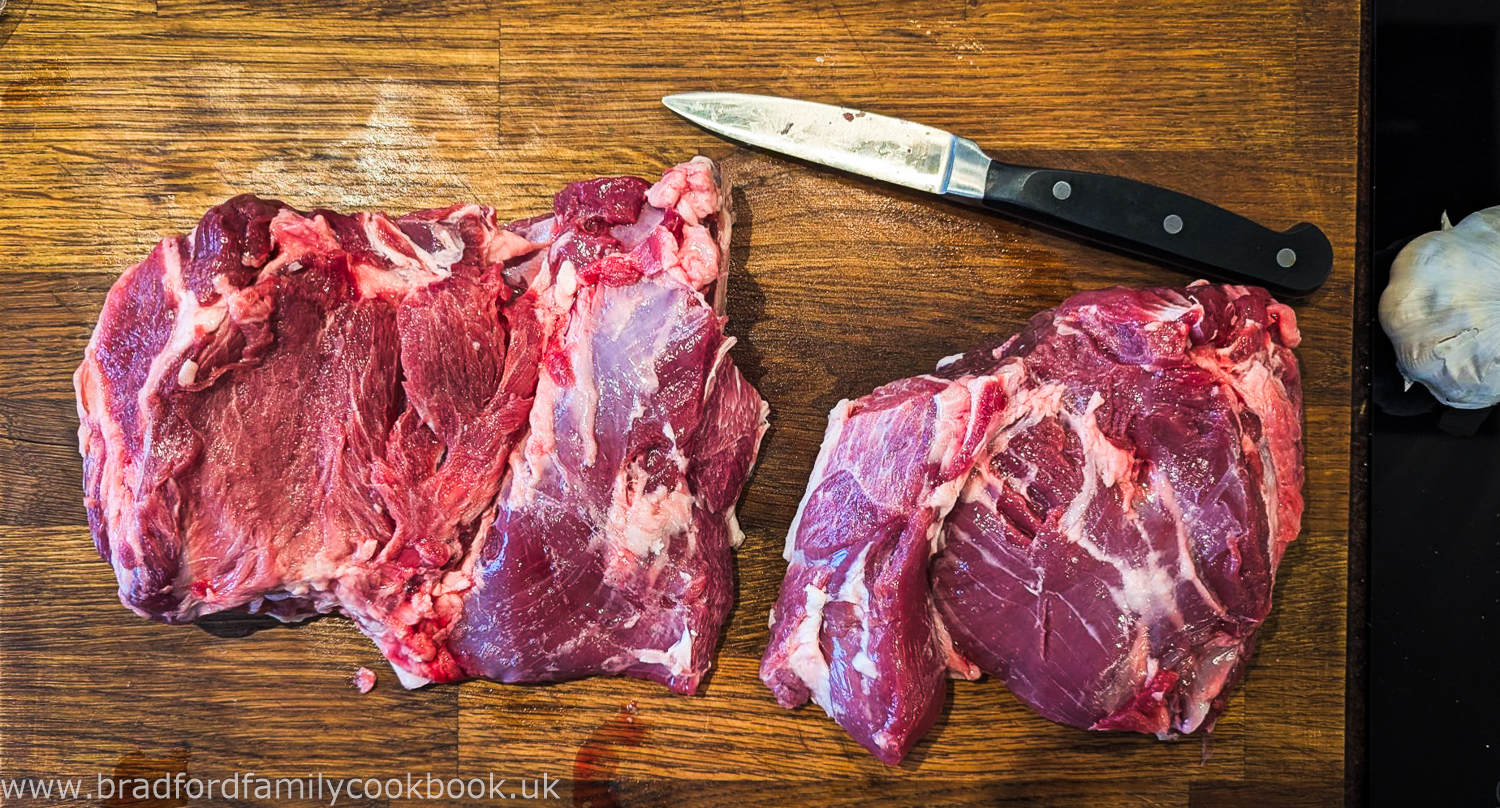
We had this last night (two people) and had the smaller of the two in this picture. It would have comfortably fed four people, but much smaller and you’d need to cook it in a different way than roasting it
The rest on the left will be in a Rendang soon!
How to do it
This is the bit where my family usually find they have a pressing engagement in another - any other - part of the house. It doesn’t look nice, especially when you’re as unskilled as me, but you won’t be sorry you did it.
Equipment
You need a big enough board as you’ll need to move it around, and you need to board to be secure. I use a heavy wooden board that doesn’t move around much, our flimsier plastic ones would need to be secured - putting a folded tea towel underneath is usually enough.
The knife is crucial, not just to make your job easier, but for your safety. Choose a small, very sharp knife. Something like a filleting knife sounds like the right thing, but anything that thin and flexible is a disaster waiting to happen. Likewise my normal 8-10” chef’s knives. They are too cumbersome for this; you need a short blade that doesn’t flex.
You will come across some tough little cookies once you start digging around and so you can slip or jerk as they come away, so make sure the knife is always travelling AWAY from your other hand
Stage 1 Excavate the thigh bone.
Put the joint on the board with the thinner flesh side up. You’ll be able to see the ball of the hip joint at the top of the bone.
Feel your way down it to where the knee is and slice along the bone from the ball to the knee. That won’t free it - there is a lot of connective tissue - but you can see where the knee is and so where the shank can be cut off.
Stage 2 Remove the shank
You’ll see the knee joint at the end of the bone; it is round with a smooth groove in it. You can cut through beneath that to separate the shank.
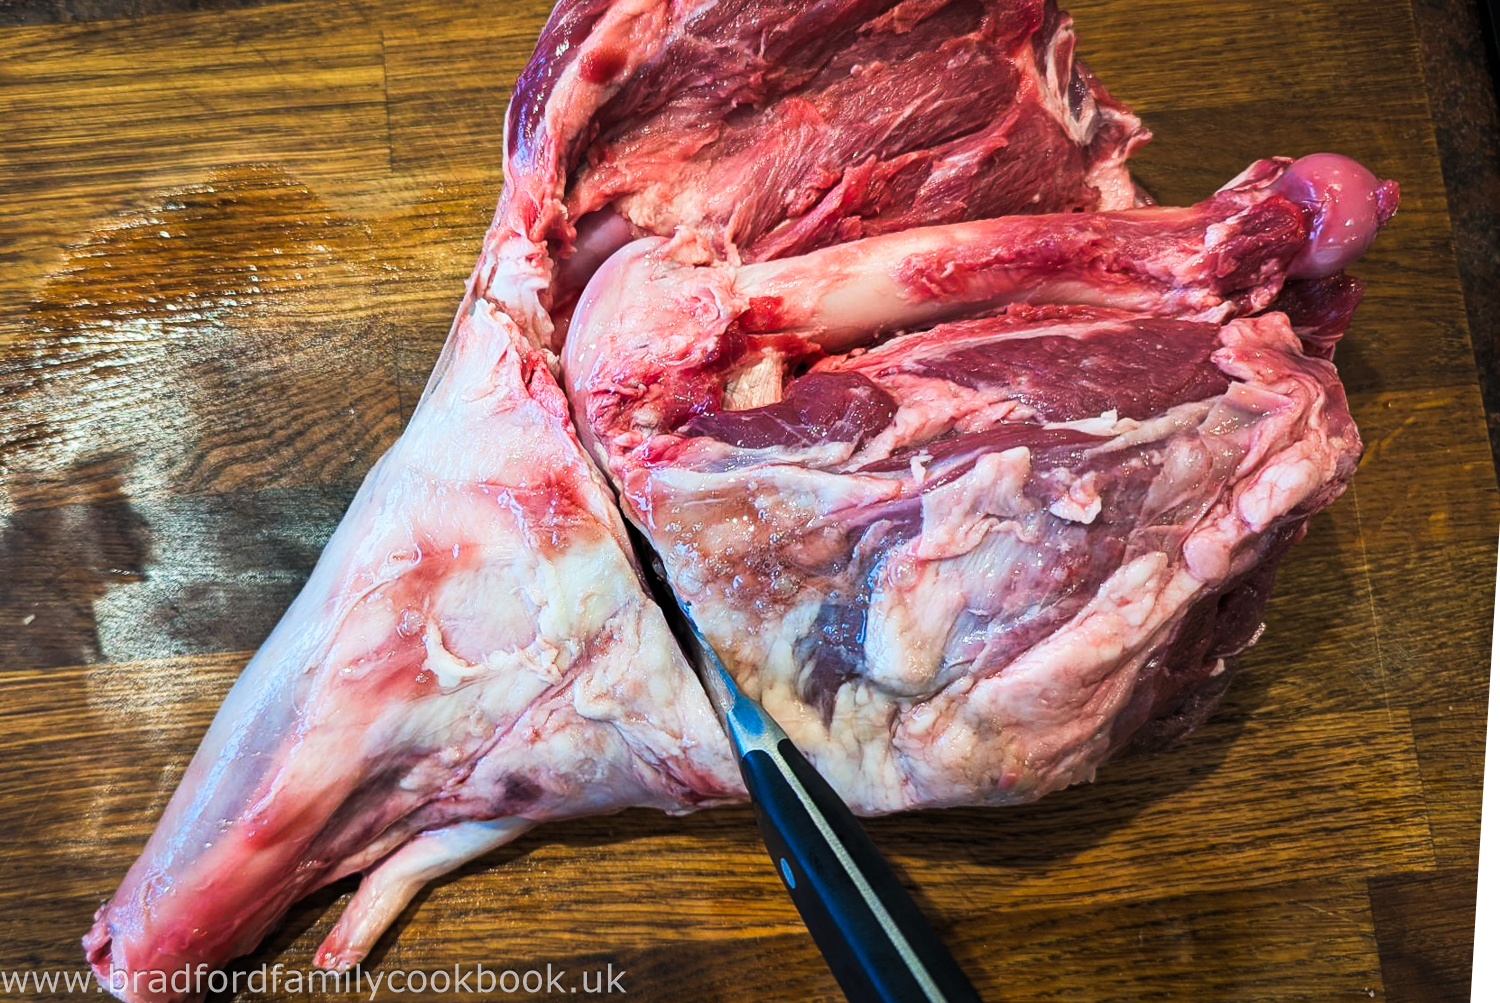
Now it’s much easier to carefully. slide the knife around the thigh bone to remove it from the upper part of the leg.
Once the bone is out you can see the kneecap (the knife is pointing to it in the picture below. Remove this.
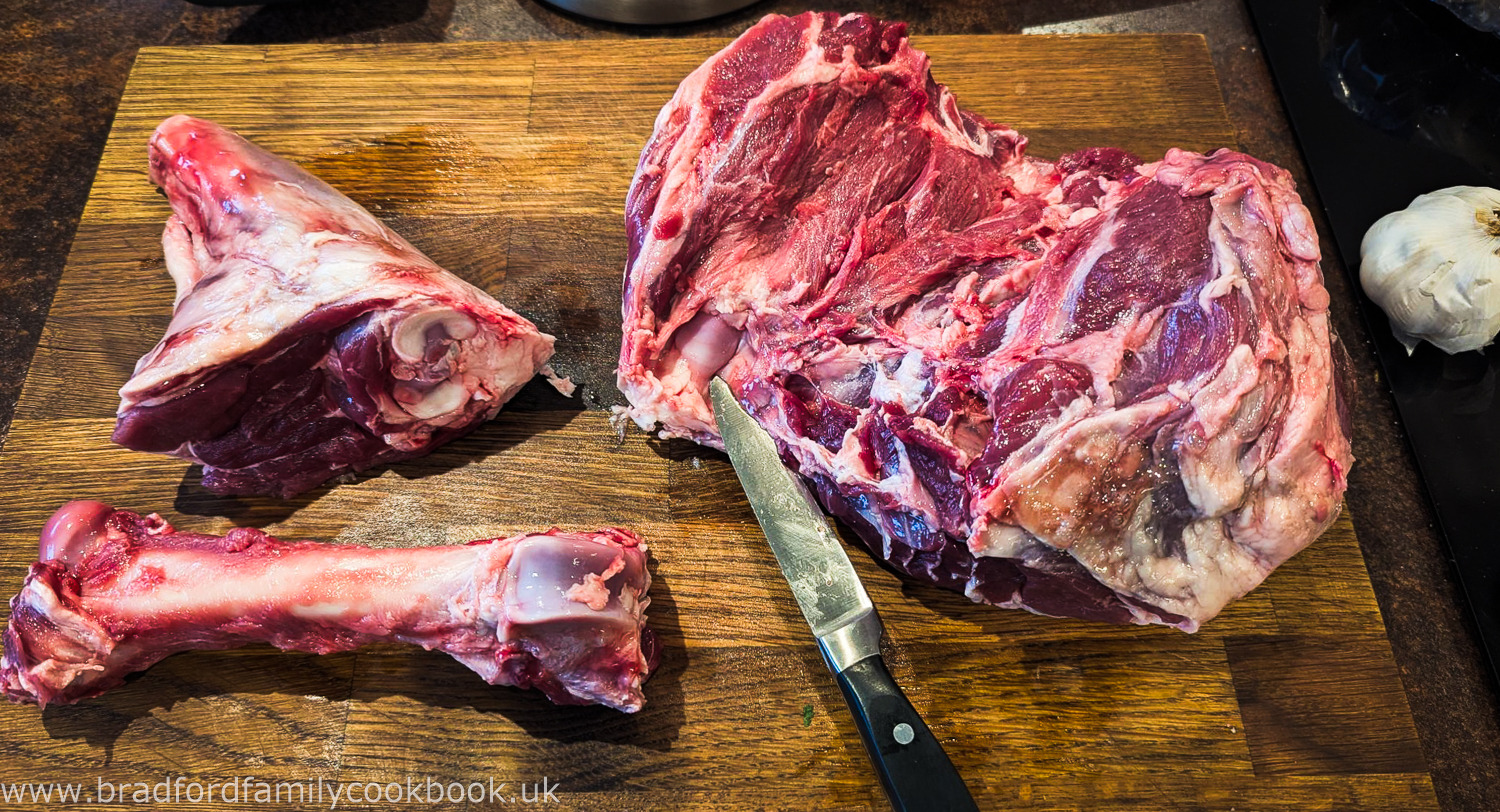
Now you’re pretty much done although you will see that one side of the “steak” is much thicker than the other and you need to even that out for cooking. If you feel carefully you’ll see a natural seam between two muscles; it runs pretty horizontally when the meat is in this position. if you run your knife gently along it while pulling you can easily flatten it out.
Then it’s just about trimming anything too big away. There are a couple of seams of hard fat that I usually remove and then do a bit of general tidying up.
Then cut it into the two parts unless you are roasting the whole thing.
That’s it!